Project by: Daria Fowler (10th Grade)
Project Advisor: Shauna Finn
Student(s)’s Advisor: Jessica Tan
Description of the Project: I am aiming to complete a series of at least five individual objects that can be displayed in an exhibit that will challenge the viewer to find their connection. This is the part of the project that I hope to master that will cause my viewers to think. Additionally, I hope to challenge myself to hone my observational and 3d sculptural skills, and my goal is to make a group of objects that somehow relate to one another in the end. I became fascinated with this medium while completing assignments in my T2 3-D art class. I found paper-mâché to be even more interesting than other traditional mediums because the sculptures were made from simple household items; newspaper, flour, and water.
Final Product: 

Final Reflection on Learning: Through completing my five sculptures, I developed a deeper respect for the art of paper-mâché. As a child, I was introduced to paper-mâché by my mother and I remember enjoying the gooiness of the flour mixture. Now, I recognize that the creative magic of paper-mâché occurs through patience and belief in the step-by-step process. Paper-mâché is an art form that requires the artist to first create a sculpture out of a separate medium. The artist then covers that sculpture with a gooey mess. The next step requires the artist to wait patiently for a day while the mess dries so that the artist can break the sculpture in half and remove and discard the original sculpture. The creative process of paper-mâché requires the artist to being willing to destroy some of what they’ve created and hold faith and patience in the finished project.
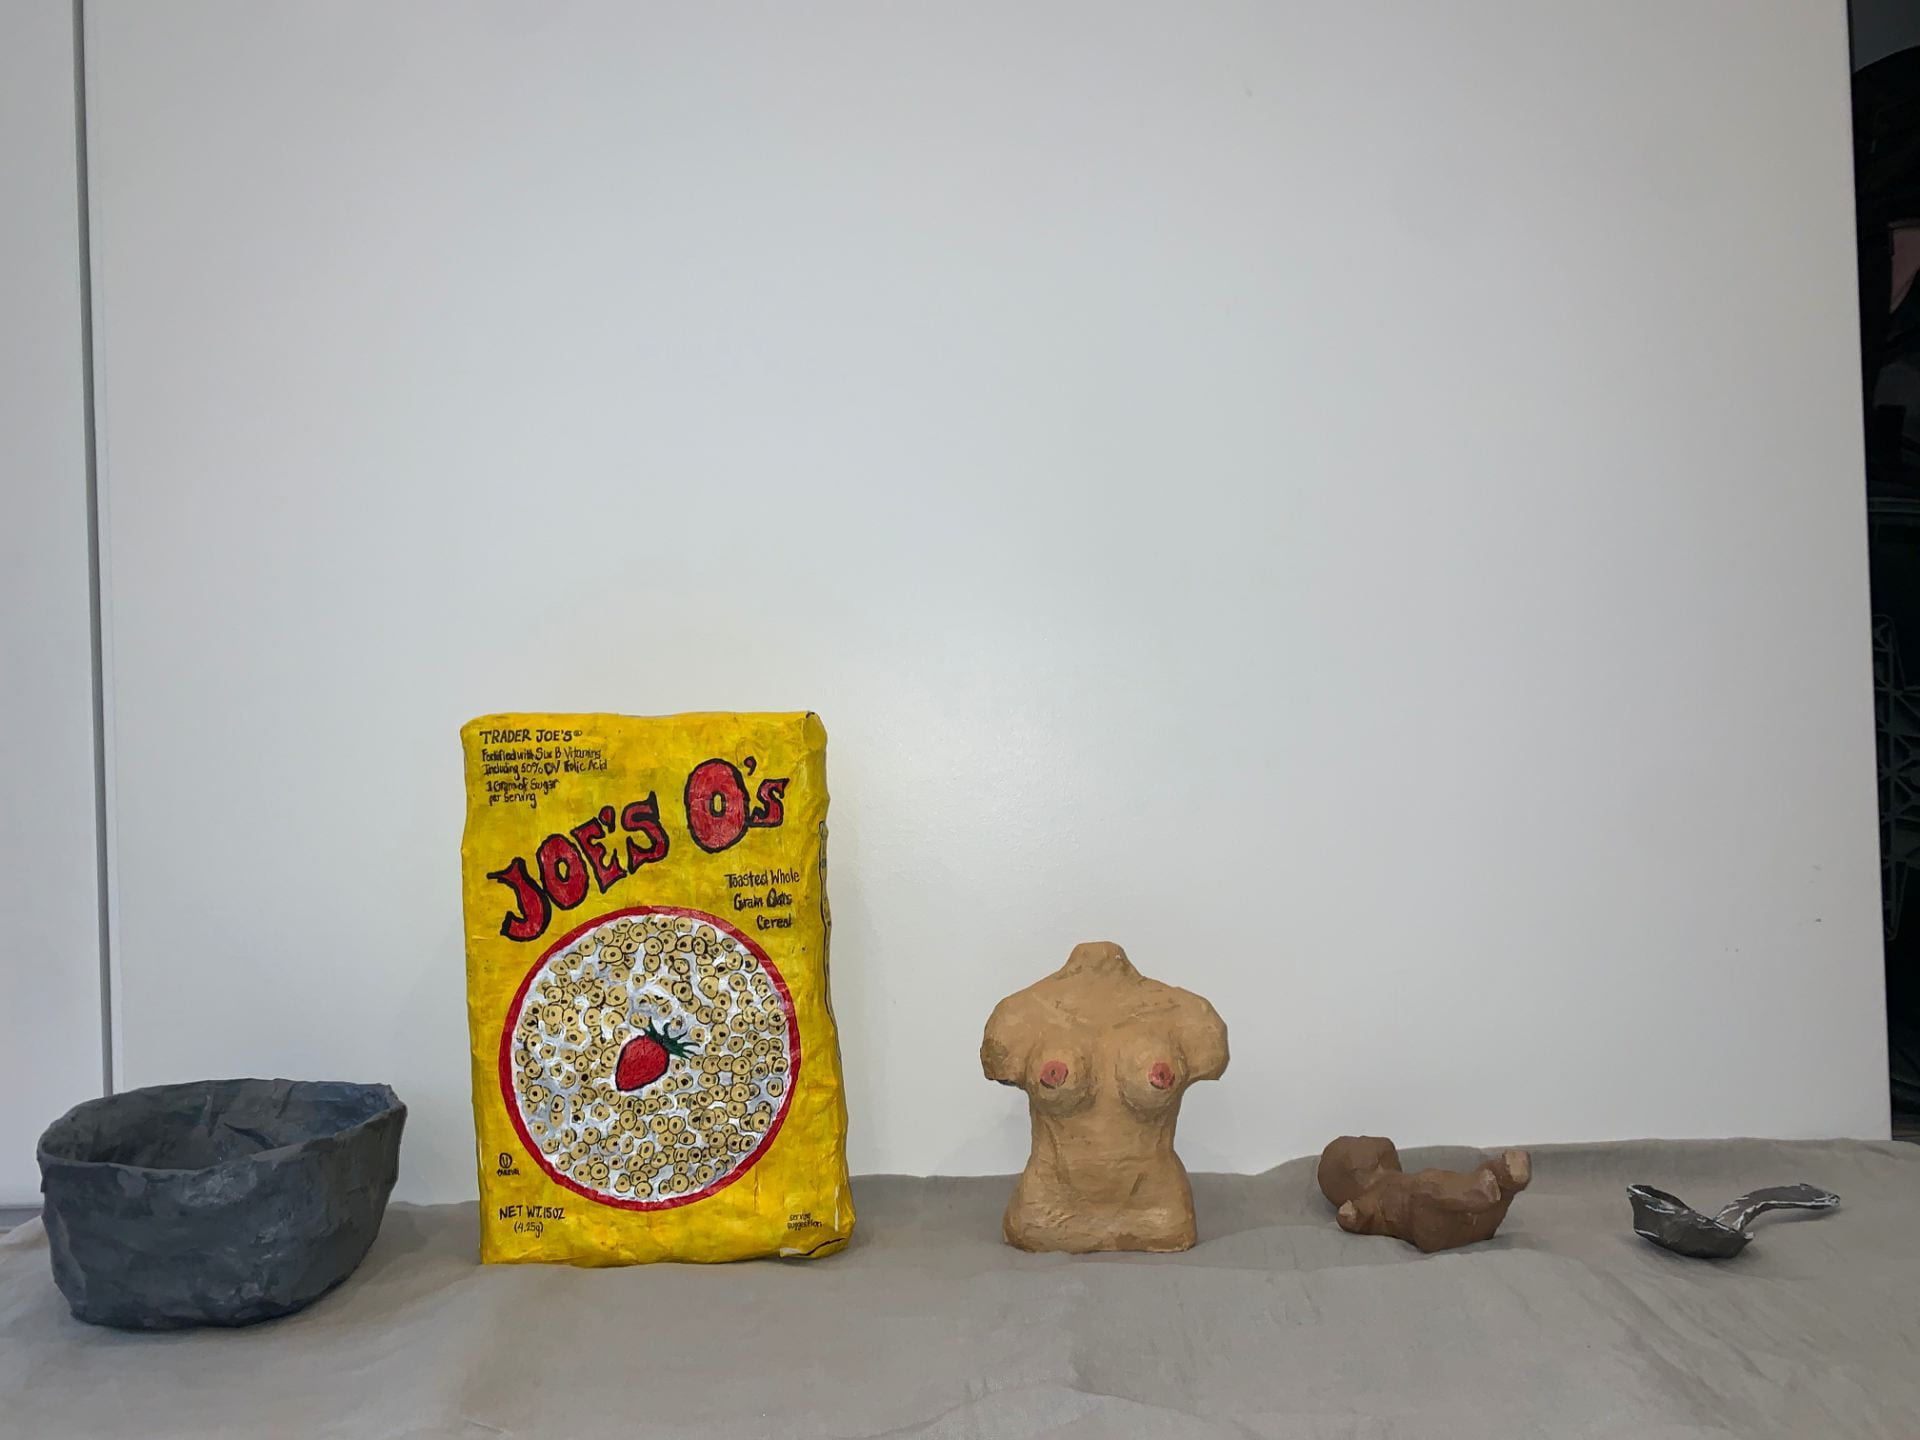
Update on Progress from Weeks 1-3 (include any photos or video if relevant): During weeks one through three, I created a bowl and cereal box, the first two items from my series of five sculptures. I first created the frames out of chicken wire. I then tore strips of newspaper that I dipped into a homemade mixture of flour and water. I quickly layered the strips onto the chicken wireframes until they reached the shape I wanted. I then let the sculptures dry in the sun, then painting on a base coat. Finally, I painted on the design of the cereal box.


Update on Progress from Weeks 4-6: During weeks 4 through 6, I created a bust as well as a spoon. To create the bust I first molded clay into the shape I desired. I then covered the clay in vaseline and proceeded to paper-mâché the outside. After completing two layers of paper-mâché on the bust I used an Exacto knife to split the dried newspaper. I then extracted the clay mold out of the cardboard shell of the bust and sealed it back up with a thin layer of newspaper. To create the spoon I cut out the outline of a standard-sized spoon. I then built up the sides and bottom with newspaper and tape to give shape to the cardboard cutout. Once completing two layers and leaving the sculptures to dry I then painted the outside of each.


Update on Progress from Weeks 7-9: During weeks 7 through 9, I worked on sculpting a baby from clay. I worked the clay until I could mold it into the shape I desired. After molding the clay I then completed a couple layers of paper-mâché, letting the first layer dry before applying the second. In order to remove the clay, I cut down the middle of both sides to split open the sculpture. I then removed the clay from the shell of paper and sealed the outer shell back together by completing another layer of paper-mâché. Lastly, I painted the outside of the sculpture.


")

")

")

